ATLANTA — We want to help you keep your kids occupied and educated while they are at home. This is the first of many installments of the StormTrackers School coming next week.
Each day next week we will try to teach you and the kids something new about the weather.
This lesson will focus on two weather instruments you can make at home. Many of these materials you may already have but you might need to purchase a few from the store.
Barometer
A barometer measures the atmospheric pressure. High or increasing pressure generally means dry weather will low or decreasing pressure generally means rain is on the way.
Materials

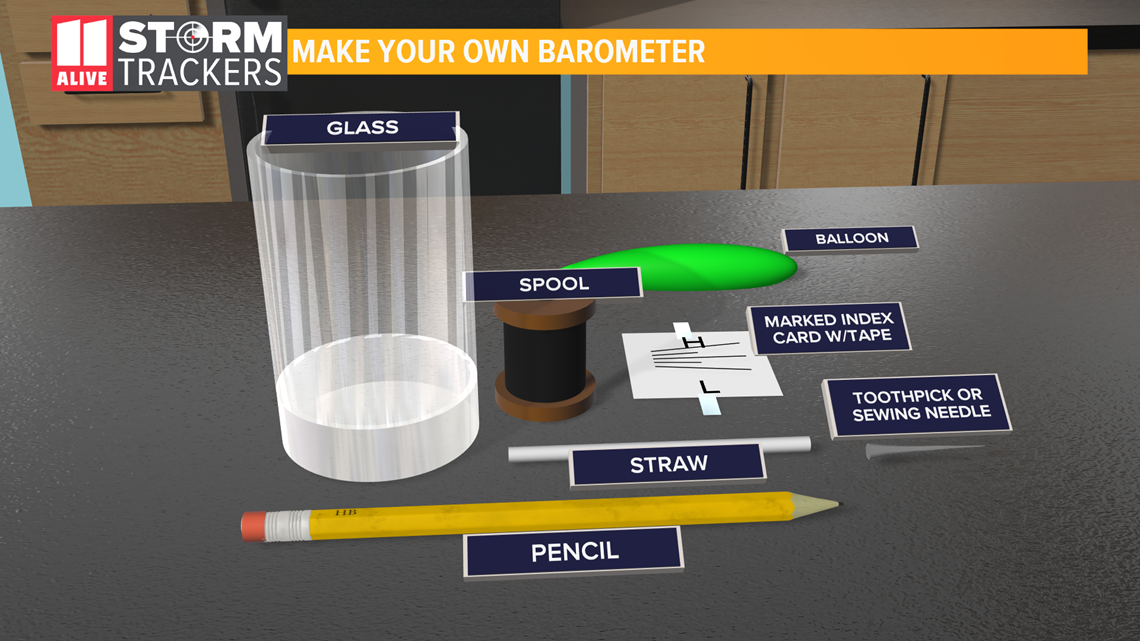
- Drinking cup or glass
- Pencil
- Straw
- Spool of thread
- Index card(marked as shown)
- Toothpick, a sewing needle, small golf tee(the pointer)
- Balloon
- Glue
- Tape
Set up

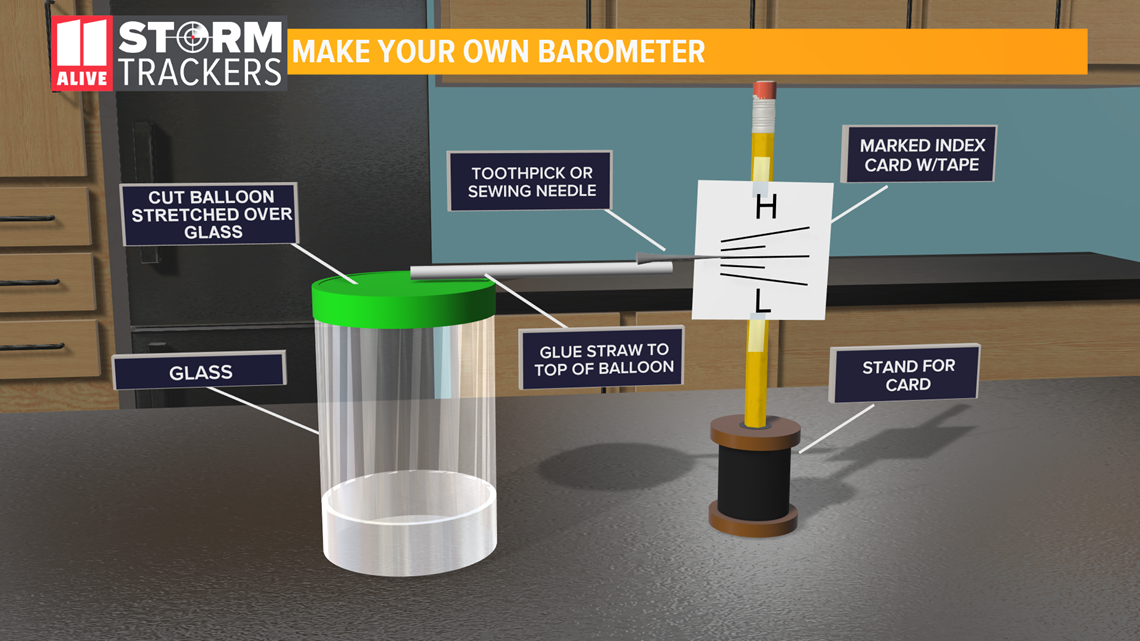
- Cut off the thin neck of the balloon and stretch over the glass
- Glue or tape your pointer to one end of the straw
- Glue or tape the other end of the straw to the middle of the balloon over the glass
- Tape the card to the pencil, make sure H is on the top, L on the bottom
- Insert the sharpened end of the pencil into the spool hole
- Move the two parts close to one another so that the pointer can indicate on the card what type of pressure you are experiencing
You will want to monitor the pressure change over a couple of days. Take a picture of the measurement one day, then check a day or two later to see if it has changed!

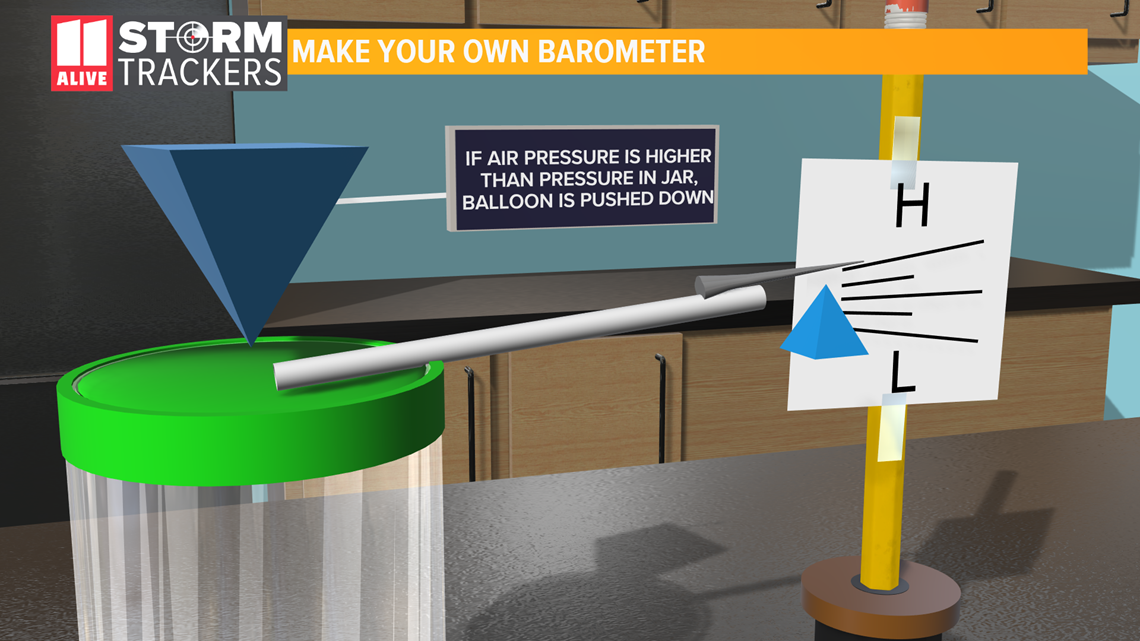

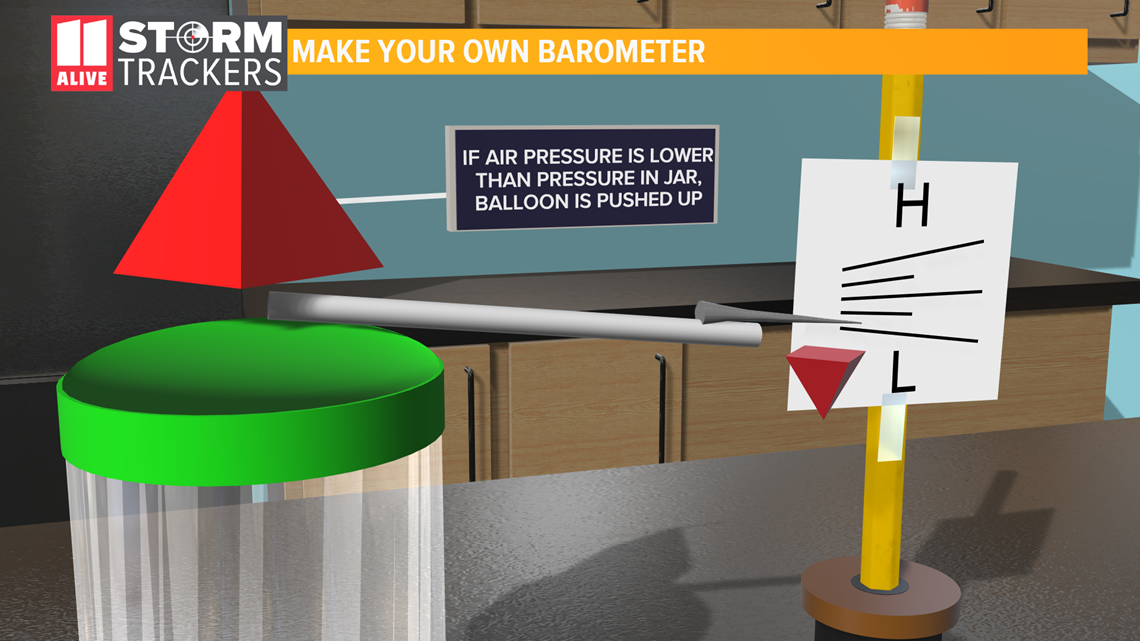
As the pressure changes the straw will move up and down. During high pressure, the atmosphere is pushing down on the balloon, while during low pressure the balloon is allowed to expand.
Now your at-home barometer can help you predict the weather!
Hygrometer
A hygrometer measures the amount of moisture or humidity in the air. Atmospheric moisture is most noticeable in the spring and summer times in Georgia as temperatures increase, making it feel warmer outside.
Materials

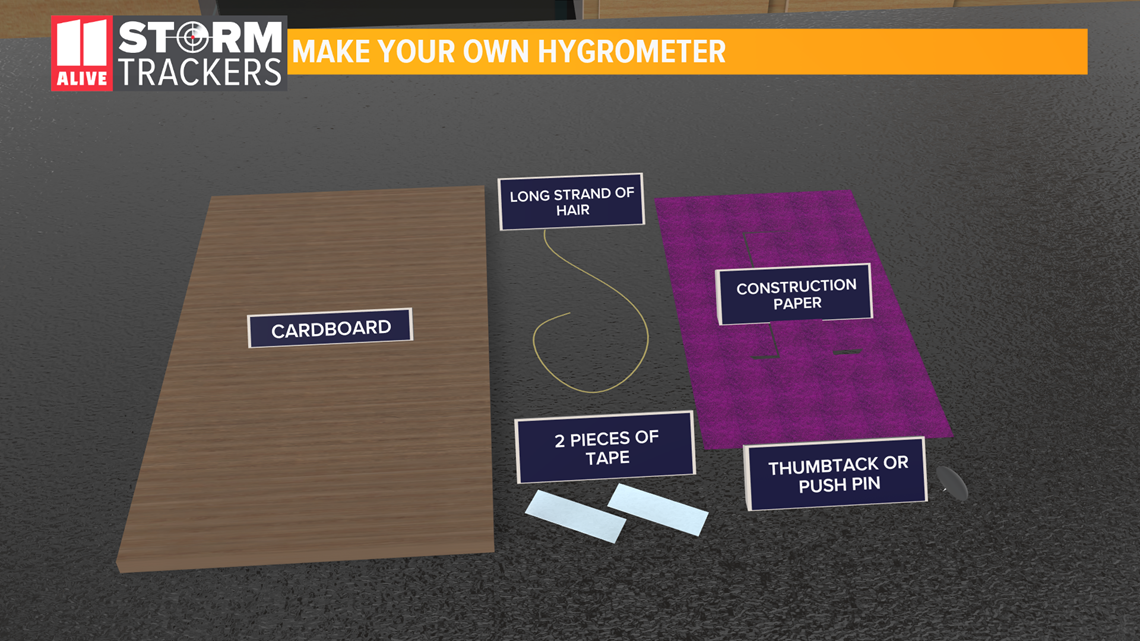
- Piece of hair
- Cardboard
- Tape
- Thumbtack, push pin, or needle
- Paper
Set up

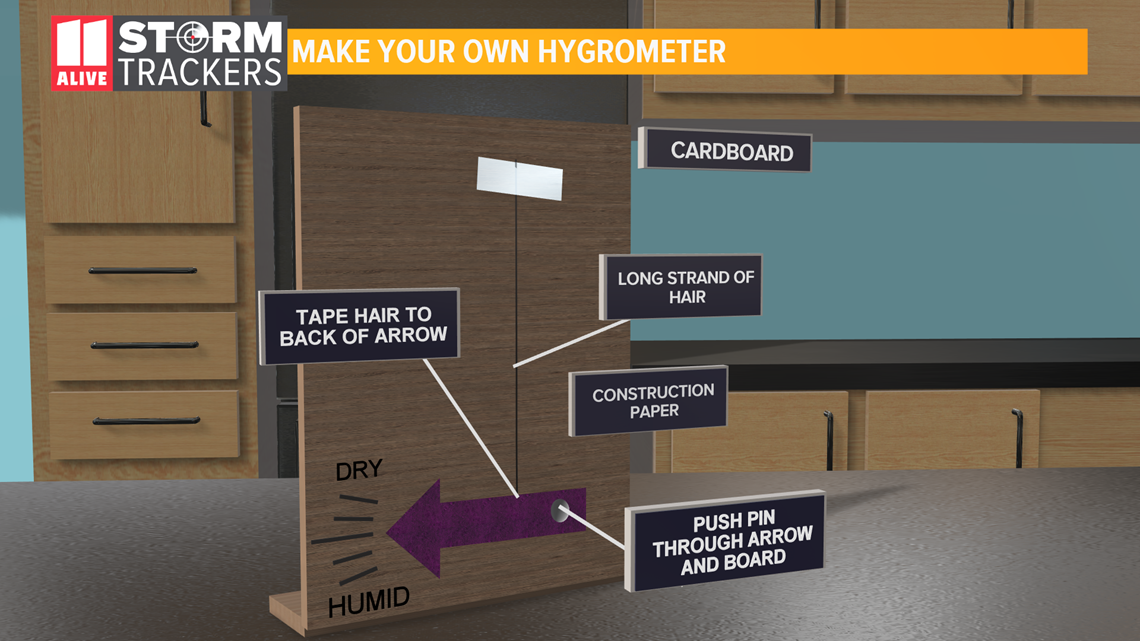
- Bend the bottom of the cardboard so it can stand up on its own
- Mark an area of dry and humid with dashes as shown in the picture
- Cut the paper out into an arrow
- Take one end of the hair strand and tape it near the top of the card board
- Tape the other end of the hair to the arrow at the bottom of the cardboard
- Insert the pushpin, thumbtack or needle at the end of the arrow, as a pivot point
The hair will react to the moisture in the atmosphere!

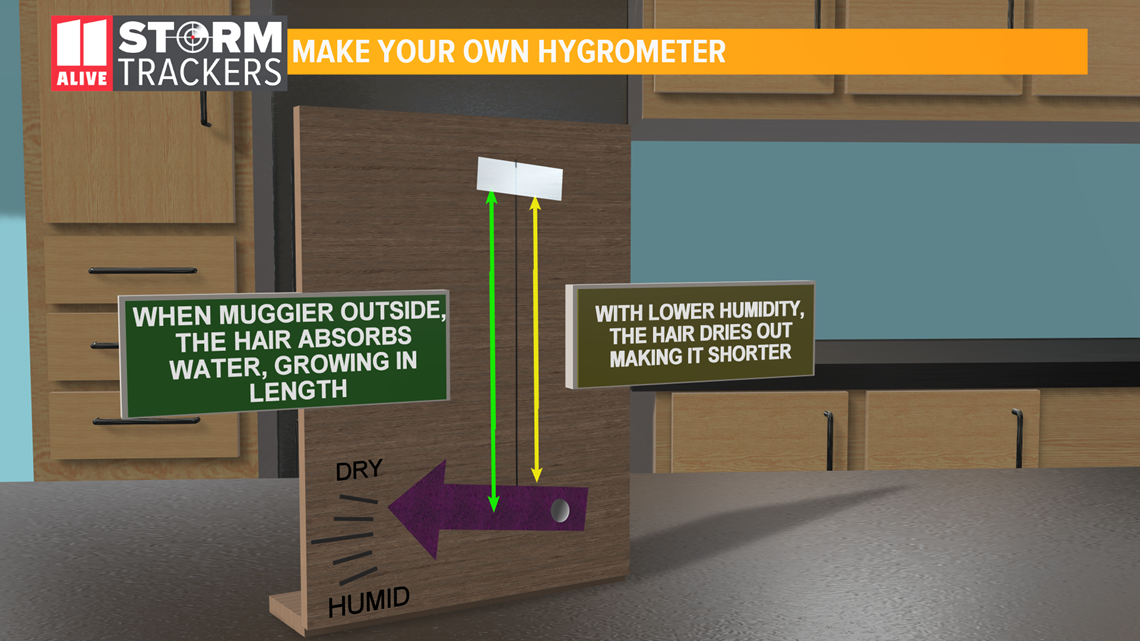
With high humidity, the hair will grow in length moving the arrow down toward the "humid" marker. As the air gets drier, the hair will get shorter and move the arrow to the dry marker.
Stay tuned for more StormTracker School lessons coming next week!

